
Making dried fruit using an air fryer at home is easier than many people think. With just fresh fruit, a simple prep, and the right temperature, you can create healthy, naturally sweet snacks without added sugar or preservatives. This guide will walk you through everything you need to know, from what tools to prepare, to step-by-step drying, and which fruits give the best results. Whether you are new to air fryers or looking for a better way to make homemade dried fruit, this article will help you get consistent, tasty results in your own kitchen.
I. Can You Really Make Dried Fruit Using an Air Fryer?
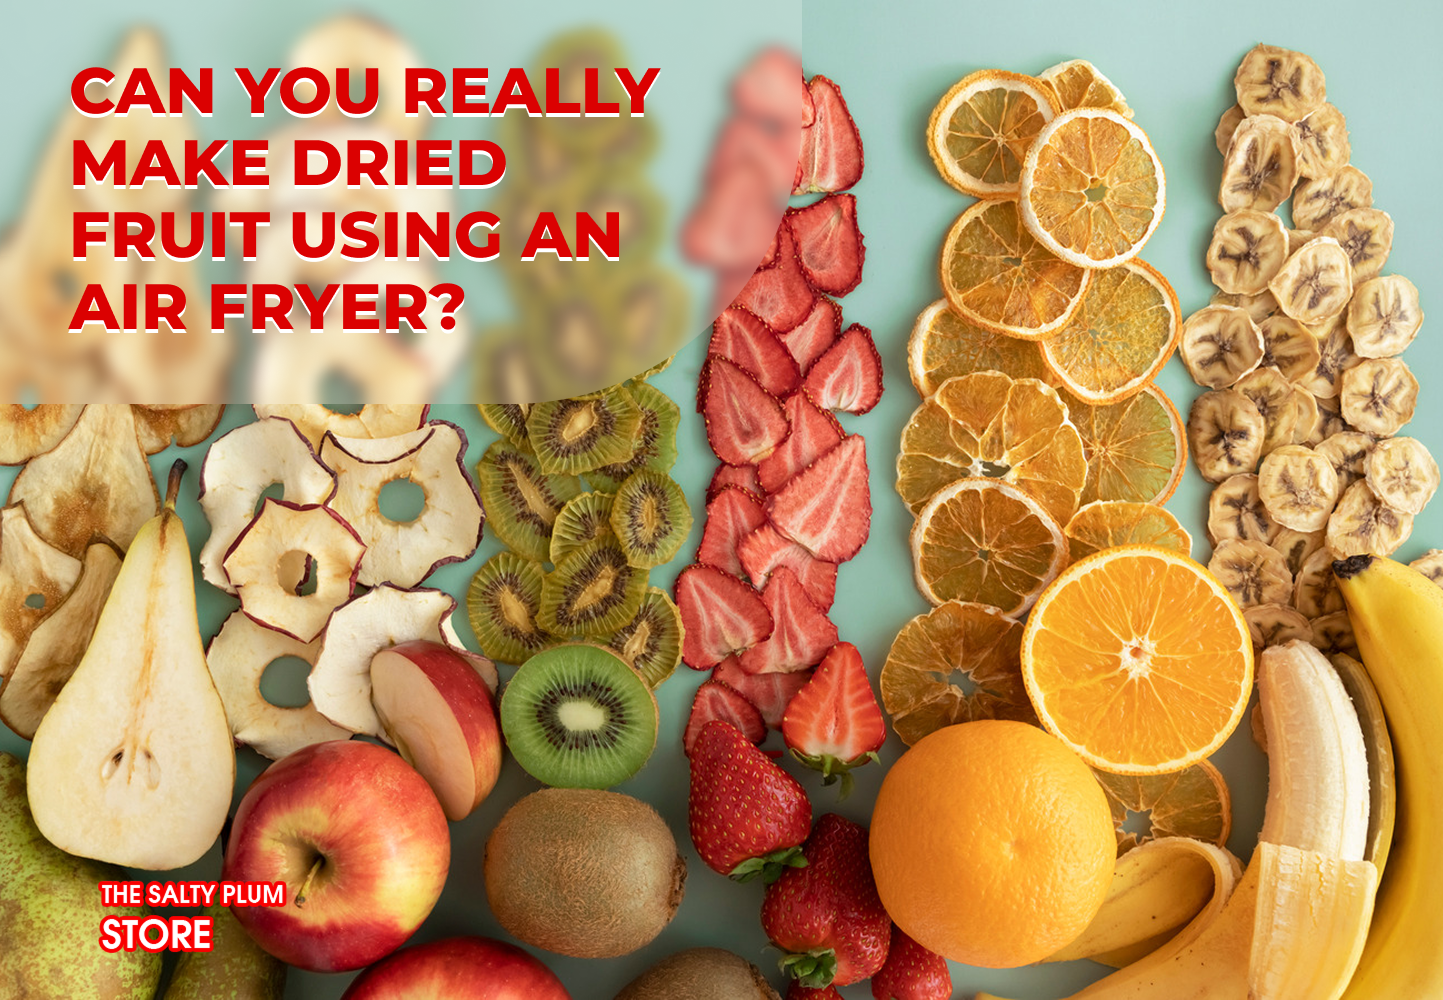
Yes, you absolutely can make dried fruit using an air fryer right in your kitchen. An air fryer works by circulating hot air around the food, which helps remove moisture from fruit slices and creates that chewy or slightly crispy texture you expect from dried fruit. While a traditional dehydrator is designed specifically for this purpose, the air fryer offers a faster and more convenient option for home cooks.
The key is to slice the fruit evenly, set the right temperature, and allow enough time for the air fryer to do its job. With a little patience, you’ll end up with a healthy snack that’s naturally sweet, easy to store, and perfect for on-the-go munching. This method is especially helpful if you want to try small batches without investing in extra kitchen equipment.
II. What You Need to Make Dried Fruit Using an Air Fryer
To make dried fruit using an air fryer, you only need a few basic ingredients and tools. Precise preparation helps the fruit dry evenly and gives better texture.
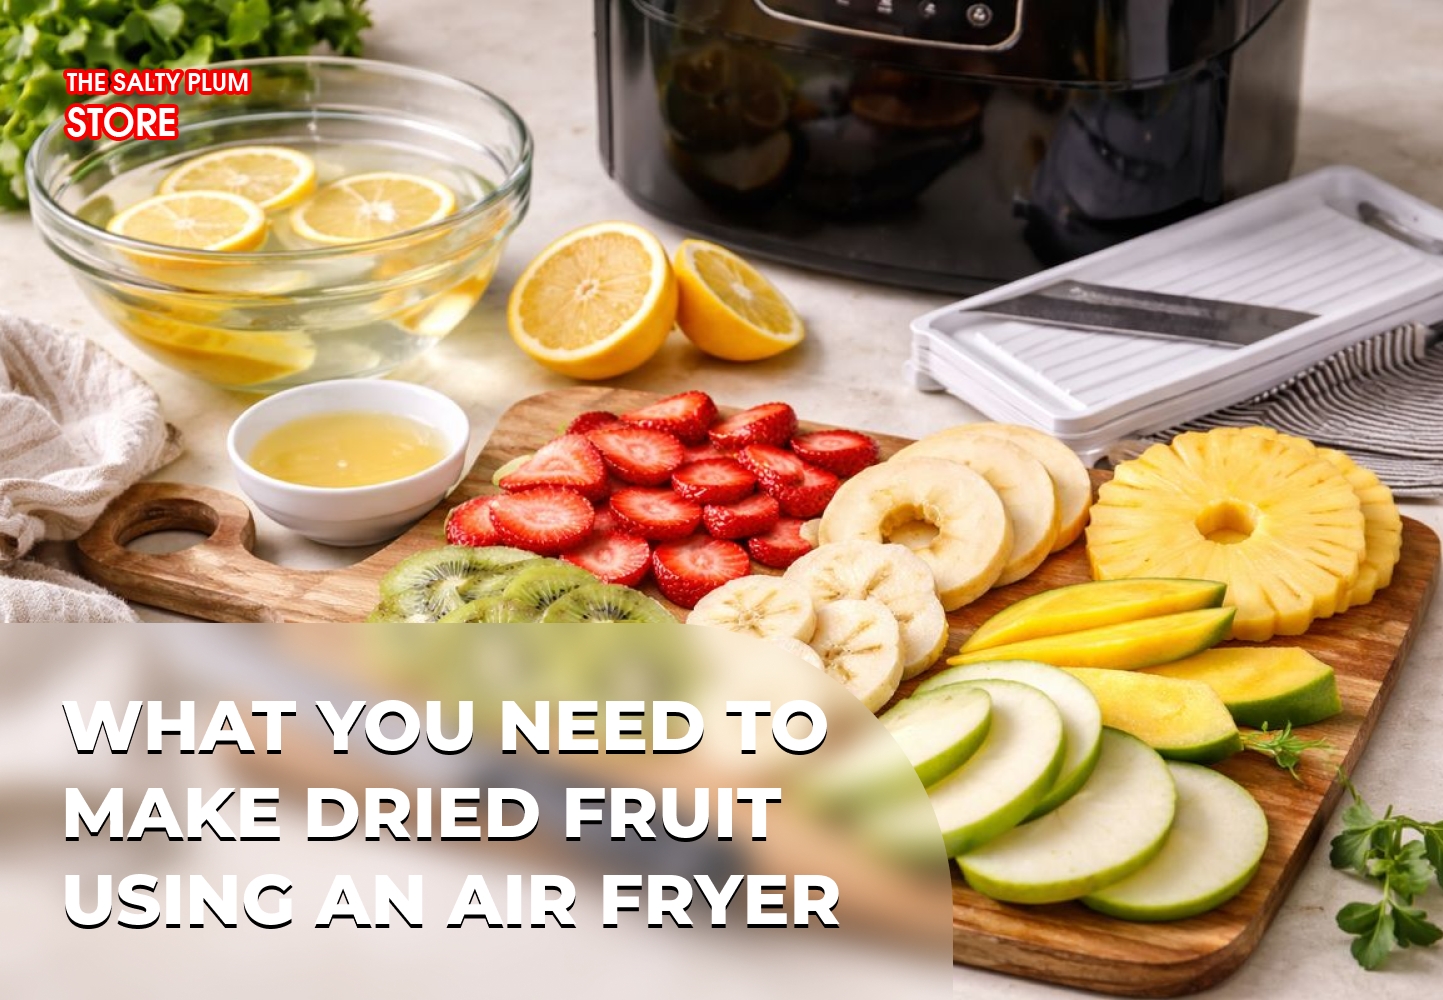
Ingredients
- Fresh fruit: 500 g to 1 kg (Common choices are apples, bananas, mangoes, pineapples, strawberries, or kiwis.)
- Lemon juice: 1 to 2 tablespoons
- Water: 500 ml
Tools
- An air fryer that allows you to adjust temperature settings
- A sharp kitchen knife or mandoline for uniform slicing
- Cutting board
- Mixing bowl
- Paper towels or clean kitchen towel
- Air fryer basket or rack
With these simple ingredients and tools, you are ready to start making dried fruit using an air fryer at home with consistent and reliable results.
Read more: How to Make Delicious Dried Mango Enchilados at Home
III. How to Make Dried Fruit Using an Air Fryer Step-by-Step
Follow these detailed steps to successfully make dried fruit using an air fryer. The entire process takes 2-7 hours depending on the fruit type and your desired texture.
Step 1: Prepare Your Fruit (10-15 minutes)
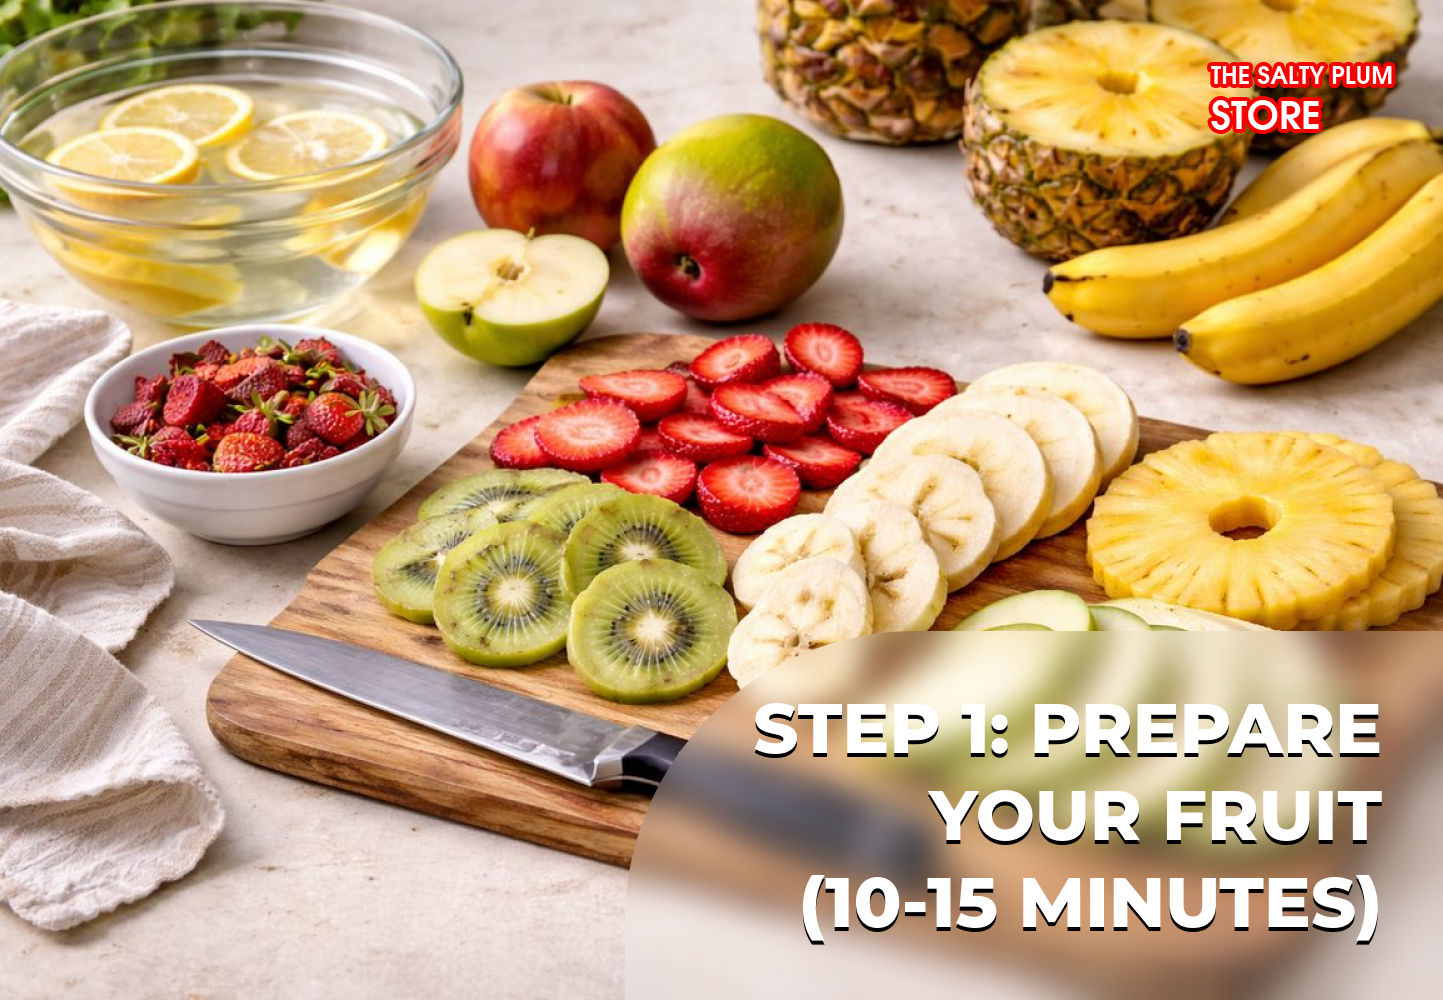
Wash thoroughly: Rinse 500g to 1kg of fresh fruit under cool running water. Use your hands to gently rub the skin to remove any dirt, wax, or residue. Pat completely dry with paper towels or a clean kitchen towel.
Peel if necessary
- Apples and pears: optional, you can leave the skin on
- Bananas: always peel completely
- Mangoes and pineapples: remove skin and core
- Strawberries and kiwis: remove stems and leaves; peeling is optional
Remove cores, seeds, and pits: Cut out apple cores, remove pineapple cores, and take out any seeds or pits. These parts don't dry well and affect the final texture of your dried fruit using an air fryer.
Step 2: Slice Evenly (10-15 minutes)
Cut to uniform thickness: Use a sharp knife or mandoline slicer to cut fruit into slices 3-6mm thick (about 1/8 to 1/4 inch). Consistent thickness is crucial for making dried fruit using an air fryer successfully.
Specific cutting guides:
- Apples: slice horizontally into rounds or vertically into half-moons, 3-4mm thick
- Bananas: cut diagonally into ovals, 5-6mm thick
- Strawberries: slice vertically from top to bottom, 3-4mm thick
- Pineapple: cut into rings or triangular chunks, 4-5mm thick
- Mangoes: slice into strips, 5-6mm thick
- Kiwis: cut into rounds, 3-4mm thick
Keep sizes similar: All slices in one batch should be the same thickness. Uneven slices create problems when making dried fruit using an air fryer because thin pieces burn while thick ones stay moist. If you have thicker pieces, set them aside for a separate batch.
Step 3: Prevent Browning (5-10 minutes, Optional)
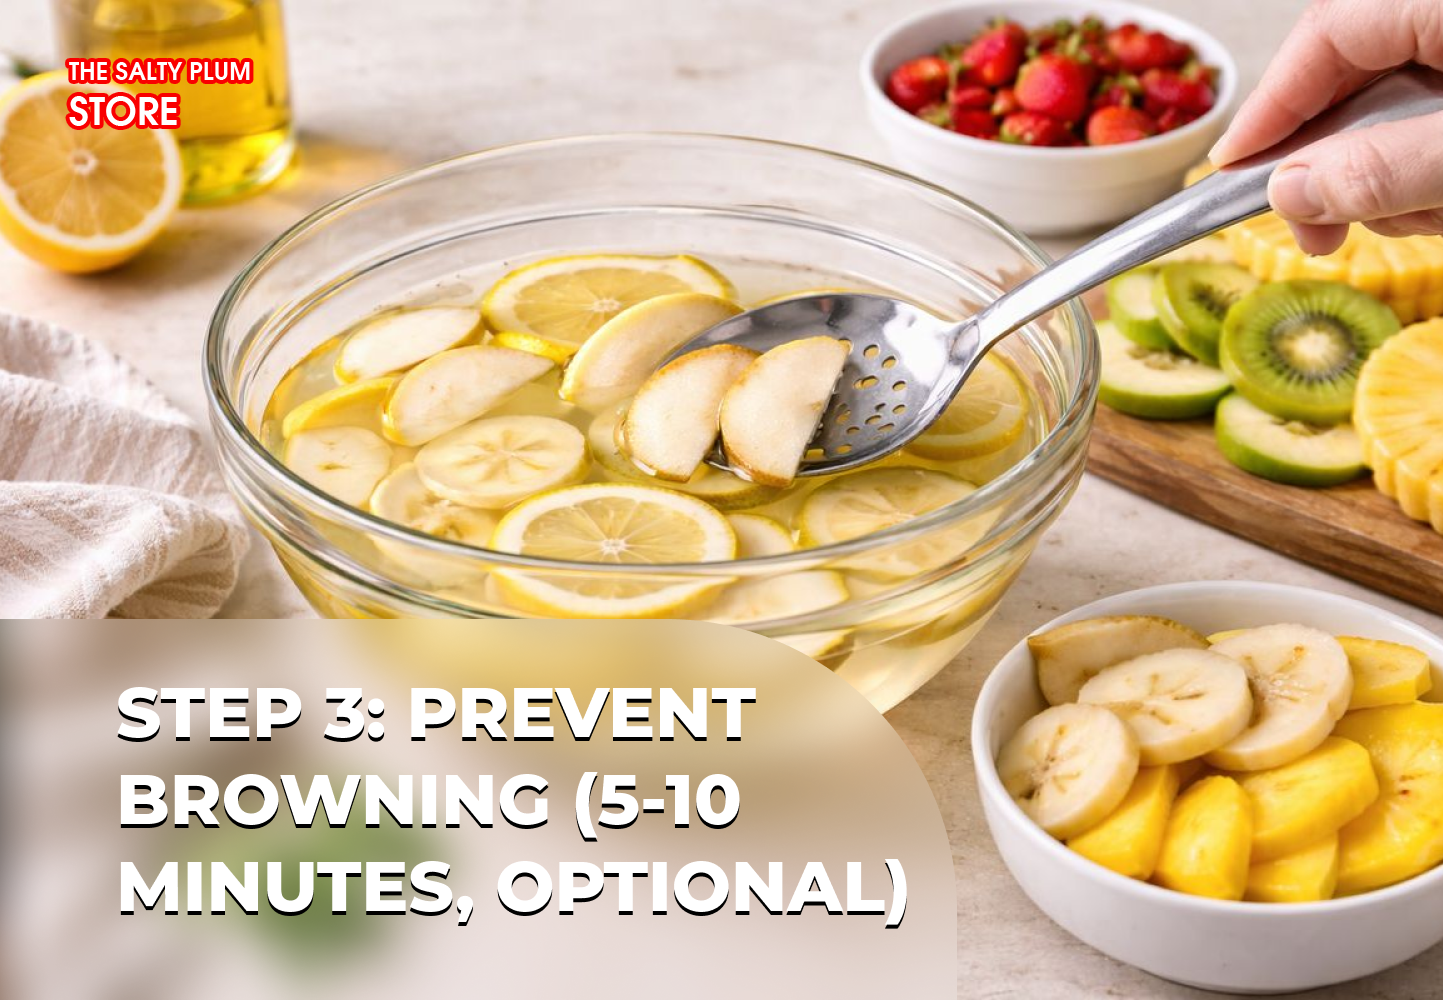
- Prepare lemon water solution: Mix 1 to 2 tablespoons of lemon juice with 500ml of water in your mixing bowl. Stir well to combine.
- Soak fruit slices: Submerge sliced apples, bananas, pears, or mangoes in the lemon water for 5-10 minutes. This step prevents oxidation and keeps colors bright.
- Fruits that don't need soaking: strawberries, pineapples, kiwis (these don't brown quickly).
- Drain and dry again: Remove fruit slices from the lemon water. Pat them completely dry with fresh paper towels. Any excess moisture will extend drying time significantly when making dried fruit using an air fryer.
Step 4: Arrange in Air Fryer Basket (5 minutes)
- Create a single layer: Place fruit slices in the air fryer basket or on the rack in a single layer. Don't overlap or stack pieces. This is critical when making dried fruit using an air fryer because stacked pieces won't dry evenly.
- Leave small gaps: Space slices about 3-5mm apart. Air needs to circulate around each piece for proper dehydration.
- Work in batches: If you have more fruit than fits in one layer, prepare multiple batches. A standard 3.5-quart air fryer basket holds about 150-200g of sliced fruit per batch.
Step 5: Set Temperature and Time
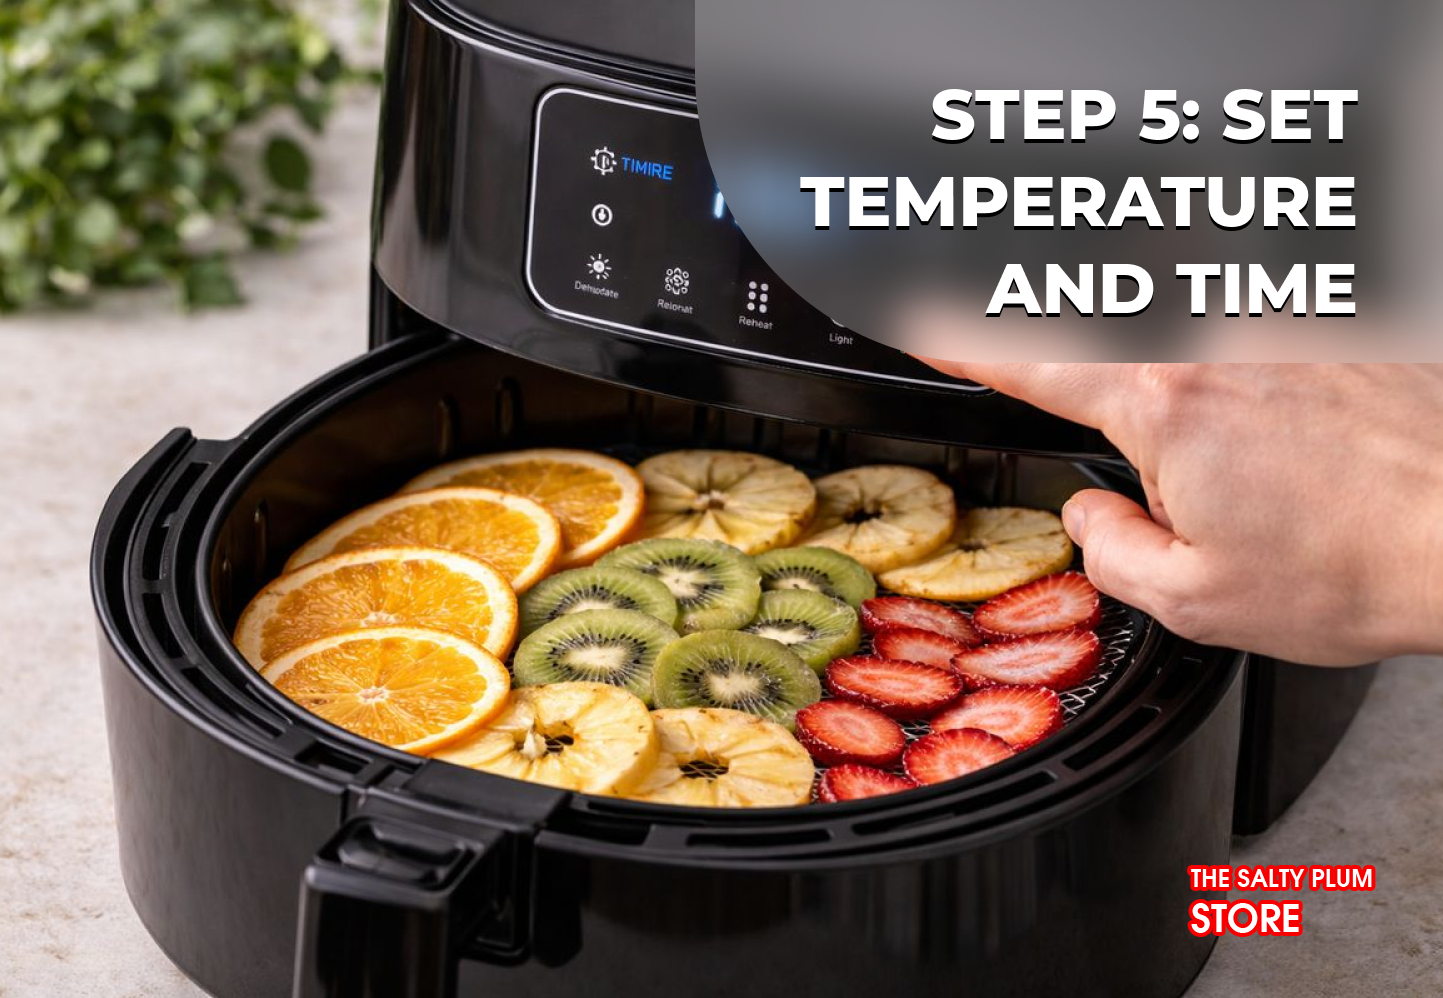
Choose the right temperature: Set your air fryer to a low temperature for proper dehydration:
- Ideal range: 125-150°F (52-65°C)
- Optimal setting: 135°F (57°C) for most fruits
- If your air fryer has a "dehydrate" function, use 175°F (79°C)
- If your air fryer's minimum is 160°F (70°C) or higher, use that setting but check fruit more frequently
Estimate drying time: Initial drying times for making dried fruit using an air fryer vary by fruit type and temperature:
At 135-145°F (57-63°C):
- Apples: 4-8 hours
- Bananas: 6-8 hours
- Strawberries: 4-5 hours
- Pineapple: 3-5 hours
- Mangoes: 5-7 hours
- Kiwis: 4-6 hours
At 175-200°F (79-93°C):
- Apples: 3-4 hours
- Bananas: 3-4 hours
- Strawberries: 2.5-4 hours
- Pineapple: 2-3 hours
- Mangoes: 3-4 hours
- Kiwis: 3-4 hours
These are starting estimates. Actual time depends on slice thickness, fruit moisture content, and your specific air fryer model.
Step 6: Flip and Rotate Every 30-45 Minutes
- Set a timer: Check your fruit every 30-45 minutes throughout the drying process. This regular attention prevents burning and ensures even results for dried fruit using an air fryer.
- Flip each piece: Use tongs or a fork to carefully turn over every slice. Both sides need equal exposure to hot air for uniform drying.
- Rotate positions: Move slices from the center of the basket toward the edges, and edge pieces toward the center. Air circulation is typically stronger in some spots than others.
- Remove pieces that finish early: Smaller or thinner slices may dry faster than thicker ones. Take them out when they reach your desired texture and continue drying the rest.
Step 7: Test for Doneness
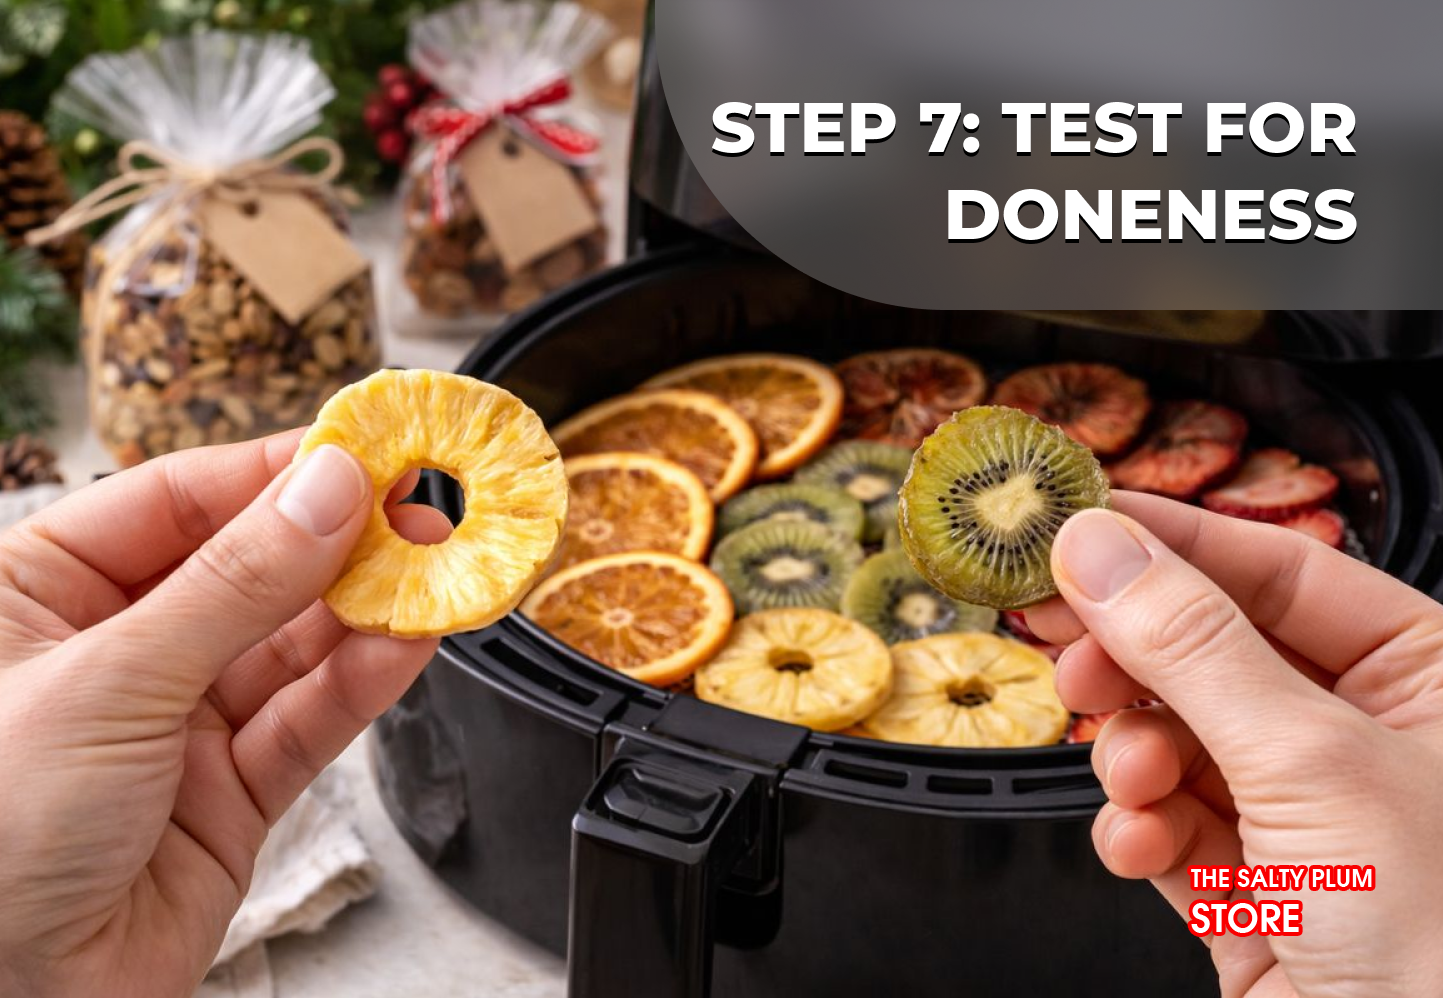
Check texture: Your dried fruit using an air fryer is ready when it feels leathery and pliable, or crispy depending on your preference. Remove a piece and let it cool for 2-3 minutes before testing. Hot fruit feels softer than it actually is, so this cooling period gives you an accurate read.
Texture guide:
- Chewy/leathery: still slightly bendable, no visible moisture when squeezed
- Crispy chips: snaps when bent, completely rigid
Look for moisture: Squeeze a cooled piece between your fingers. You shouldn't see any liquid or feel dampness. If moisture appears, continue making dried fruit using an air fryer for another 15-30 minutes.
Color check: Properly dried fruit should have deeper, more concentrated colors than fresh fruit. If pieces look pale or wet, they need more time.
Step 8: Cool Completely (15-20 minutes)
- Remove from air fryer: Once dried to your liking, transfer all fruit pieces to a cooling rack or clean plate.
- Let cool to room temperature Allow fruit to cool for 15-20 minutes. This prevents condensation when you store them. Warm fruit creates moisture in containers, which can lead to mold growth.
- Do a final texture check After cooling, the fruit should maintain its dry texture. If pieces feel soft or sticky, return them to the air fryer for another 15-30 minutes at the same temperature.
Step 9: Store Properly

Use airtight containers: Transfer completely cooled dried fruit to glass jars or resealable bags. Remove as much air as possible before sealing. Any trapped air can introduce moisture over time and affect the shelf life of your dried fruit using an air fryer.
Storage duration: Properly dried fruit stored in airtight containers lasts:
- Room temperature: 1-2 weeks
- Refrigerator: 3-4 weeks
- Freezer: up to 6 months
Label your containers: Write the fruit type and date on each container. This helps you track freshness and use older batches first.
Making dried fruit using an air fryer becomes easier with practice. After your first batch, you'll understand exactly how your specific air fryer model performs and can adjust timing for perfect results every time. Start with one fruit type to learn the process, then experiment with different varieties and flavor combinations.
IV. Conclusion
Making dried fruit using an air fryer at home is a simple way to enjoy natural, healthy snacks with full control over ingredients, sweetness, and texture. With the right temperature, proper slicing, and enough drying time, you can create chewy, flavorful dried fruit that works well for daily snacking, topping yogurt, or adding to homemade granola.
If you prefer convenience or want to explore more varieties, you can also find a wide selection of ready-made dried fruits at The Salty Plum Store. From classic favorites to unique flavor combinations, there are many options to suit different tastes and needs, making it easy to enjoy high-quality dried fruit anytime.
Related Article: