
There's something deeply comforting about slicing into a loaf of homemade dried fruit bread. The sweet aroma of plump raisins, tangy cranberries, and chewy apricots mingling with warm spices fills your kitchen long before the first bite. Unlike store-bought versions loaded with preservatives, this dried fruit bread recipe delivers genuine flavor and a tender, moist crumb that stays fresh for days.
Whether you're a seasoned baker or just starting out, this straightforward guide walks you through every step of creating a bakery-quality loaf at home. You'll learn why dried fruits transform ordinary bread into something special, how to prep them properly for maximum flavor, and the exact techniques that guarantee success every time. Get ready to bake a loaf that's perfect for breakfast toast, afternoon tea, or gifting to someone you care about.
I. Why Dried Fruit Works So Well in Bread
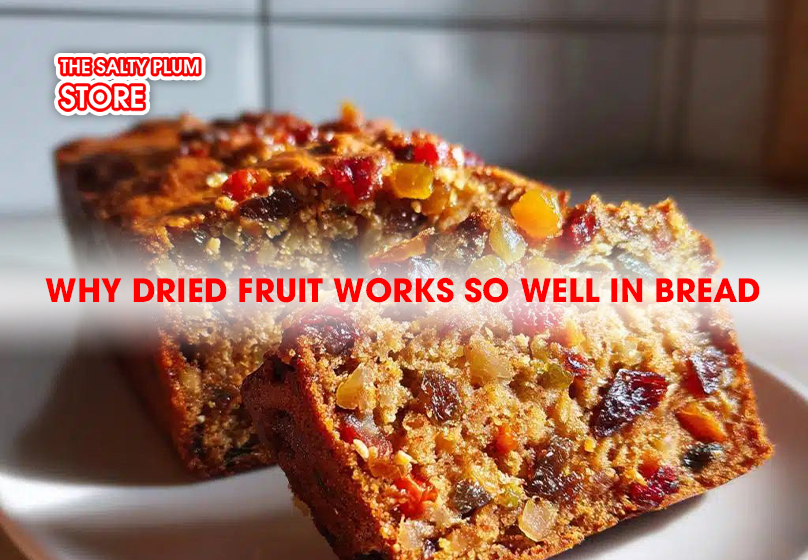
When you bake bread with dried fruit, you add more than just sweetness. The fruit pieces bring natural moisture, chewy texture, and bursts of flavor that balance the softness of the loaf. Each bite feels richer and more satisfying because the dried fruit releases subtle notes as the bread bakes.
- Flavor boost: Dried fruit concentrates the natural sugars of fresh fruit. This means raisins, apricots, or cranberries give your bread a gentle sweetness without needing too much added sugar.
- Moist texture: Even though dried fruit looks firm, it softens during baking. The fruit helps keep the crumb tender, so your bread stays moist longer.
- Nutritional value: Thanks to Dried Fruit Nutrition, you get fiber, vitamins, and minerals in every slice. These nutrients support digestion and provide steady energy.
- Health Benefits: Dried fruit is packed with antioxidants and natural compounds that promote heart health. Adding it to bread makes your homemade loaf not only delicious but also a smart choice for everyday eating.
II. Ingredients for Homemade Dried Fruit Bread
This recipe makes one standard 9x5-inch loaf that serves 10-12 slices. Make sure all ingredients are ready before you begin mixing.
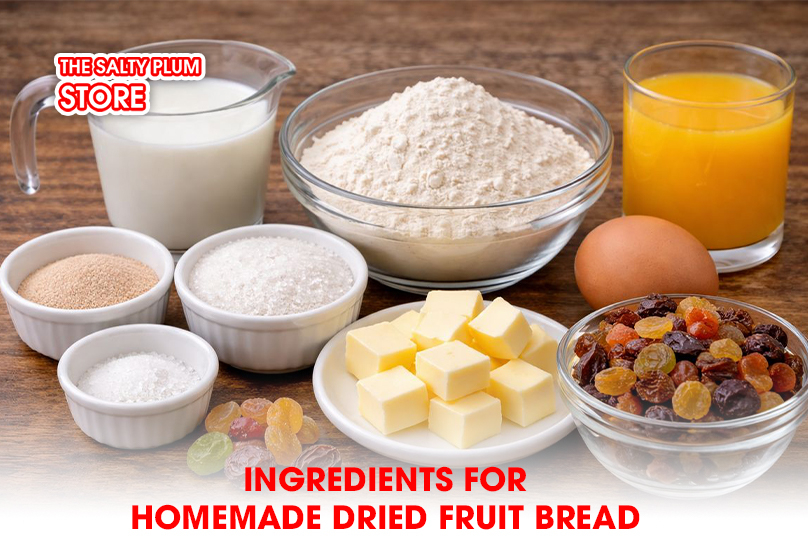
1. For the Dough
- 500g (4 cups) all-purpose flour – Provides structure and a tender crumb. Bread flour works too if you prefer chewier texture.
- 300ml (1¼ cups) whole milk, warmed to 40°C – Activates the yeast and adds richness. Low-fat milk works but gives slightly drier results.
- 7g (2¼ teaspoons) instant yeast – One standard packet. Active dry yeast needs 10 minutes blooming time first.
- 75g (⅓ cup) granulated sugar – Feeds the yeast and balances the fruit tartness.
- 60g (4 tablespoons) unsalted butter, softened – Creates a soft, pillowy texture. Salted butter works but reduce added salt by half.
- 1 large egg, room temperature – Binds ingredients and enriches the dough.
- 1 teaspoon salt – Enhances all flavors without making the bread taste salty.
2. For the Dried Fruit Mix
- 200g (1⅓ cups) mixed dried fruit – Use any combination you like:
- 100g golden raisins
- 50g dried cranberries
- 50g chopped dried apricots - 2 tablespoons orange juice or rum (optional) – Plumps the fruit and adds depth. Water works fine too.
3. For Finishing
- 1 tablespoon milk – Brushed on top for a golden crust.
- 1 tablespoon coarse sugar (optional) – Adds pleasant crunch to the crust.
Substitution Notes
Can't find certain fruits? Swap freely. Dried cherries replace cranberries perfectly. Chopped dates or figs work instead of apricots. Just keep the total dried fruit weight at 200g for proper dough balance.
No instant yeast? Use 10g active dry yeast and dissolve it in the warm milk with 1 teaspoon sugar. Wait until foamy (about 10 minutes) before adding to flour.
III. How to Prepare Dried Fruit for Baking
Proper fruit preparation makes the difference between good dried fruit bread and exceptional dried fruit bread. Skip these steps and you'll end up with hard, chewy bits that sink to the bottom of your loaf. Follow them and you get plump, evenly distributed fruit in every slice.
Step 1: Soak for Maximum Moisture
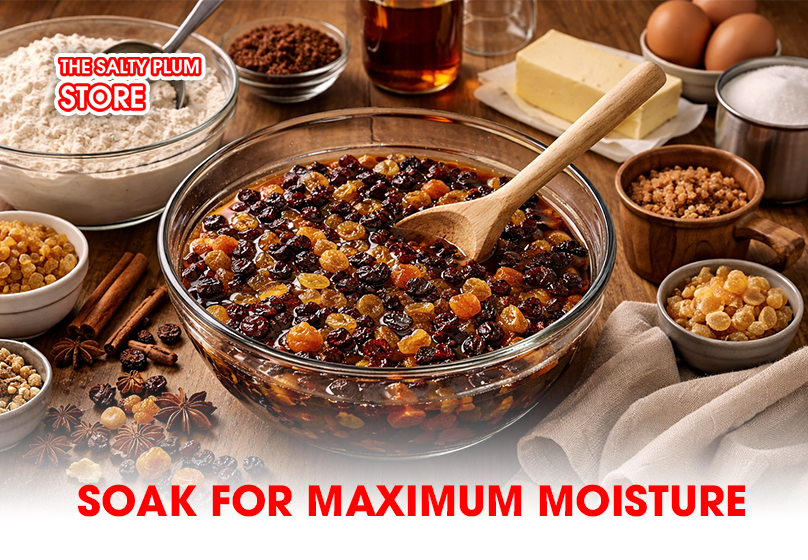
Place your 200g dried fruit mix in a medium bowl. Pour 2 tablespoons of warm orange juice, rum, or water over the top. Add just enough liquid to lightly cover the fruit. Let this sit for 15-20 minutes while you prepare the dough.
The fruit absorbs liquid and softens considerably. This prevents it from stealing moisture from your dried fruit bread dough during baking. Your loaf stays tender longer.
Step 2: Drain and Pat Dry Thoroughly
After soaking, drain the fruit in a fine-mesh strainer. Press softly to squeeze out any excess moisture. Spread the fruit on paper towels and pat the surface completely dry.
Wet fruit creates problems. It adds unpredictable moisture to your dough, throwing off the recipe balance. Worse, soggy fruit clumps together instead of distributing evenly through your dried fruit bread.
Step 3: Coat with Flour Lightly
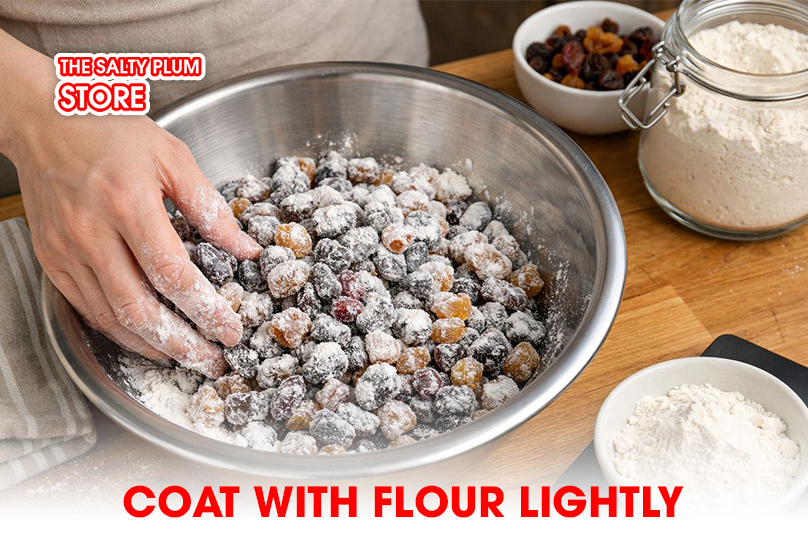
Take 2 tablespoons of flour from your measured 500g. Toss the dried fruit in this flour until each piece has a light coating. This thin layer stops the fruit from sinking during baking.
The science is simple. Flour-coated fruit grips the surrounding dough better as it rises. Your finished dried fruit bread will show fruit throughout the loaf, not just pooled at the bottom.
Step 4: Chop Larger Pieces
Any fruit bigger than a raisin needs chopping. Cut apricots, dates, or figs into raisin-sized pieces using kitchen scissors. Uniform size ensures even distribution and easier slicing later.
These four steps take less than 10 minutes total. The payoff shows in every bite of your homemade dried fruit bread.
IV. Step-by-Step Dried Fruit Bread Recipe
Follow these steps carefully for a perfectly risen dried fruit bread. Total time from start to finish is about 3 hours, including rise time.
Step 1: Activate the Dough Base
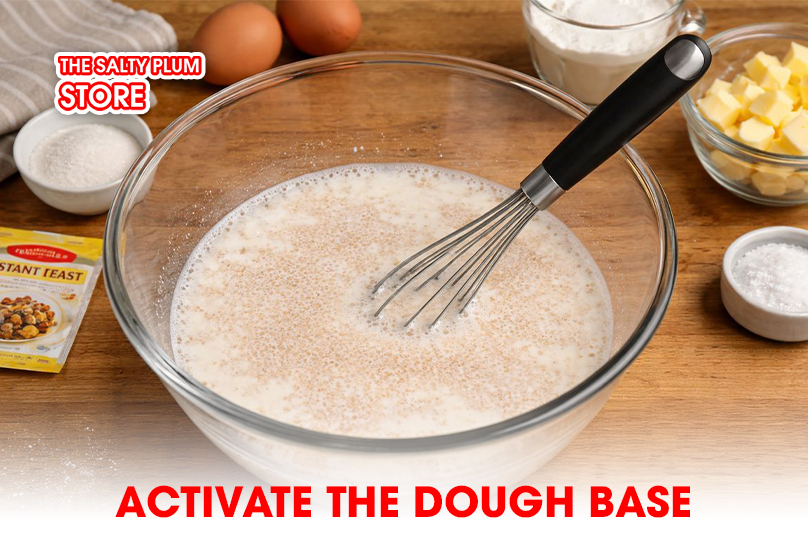
Pour 300ml warm milk (40°C) into a large mixing bowl. Sprinkle 7g instant yeast and 1 teaspoon sugar over the surface. Stir gently and let stand for 5 minutes until slightly foamy.
This step confirms your yeast is alive. No foam means dead yeast. Start over with fresh yeast before wasting other ingredients.
Step 2: Mix the Wet Ingredients
Add the remaining 75g sugar, 60g softened butter, and 1 egg to the yeast mixture. Whisk until the butter breaks down into small pieces. The mixture won't be completely smooth yet. That's fine.
Step 3: Form the Dough

Add 500g flour and 1 teaspoon salt to the wet ingredients. Mix with a wooden spoon until the dough looks rough and shaggy. You'll see dry flour patches still. Stop mixing once the ingredients are barely blended.
Turn the dough onto a lightly floured surface. Knead for 8–10 minutes until it becomes smooth and stretchy. The dough should bounce back slowly when you poke it. Add tiny amounts of flour if it sticks to your hands, but keep the dough soft.
Step 4: Incorporate the Fruit
Flatten the dough into a rectangle about 2cm thick. Scatter your prepared dried fruit evenly over the surface. Fold the dough like a letter, then knead gently for 2-3 minutes to distribute the fruit throughout.
Some fruit will poke through the surface. That's normal. Just keep working until you see fruit pieces evenly mixed in. This step is crucial for authentic dried fruit bread texture.
Step 5: First Rise
Form the dough into a neat, round ball. Place it in a lightly oiled bowl, turning it so all sides are coated. Cover with a damp kitchen towel or plastic wrap.
Let rise in a warm spot (around 24-27°C) for 60-90 minutes. The dough should double in size. Press two fingers gently into the dough. If the indent stays, it's ready. If it springs back quickly, give it 15 more minutes.
Step 6: Shape the Loaf
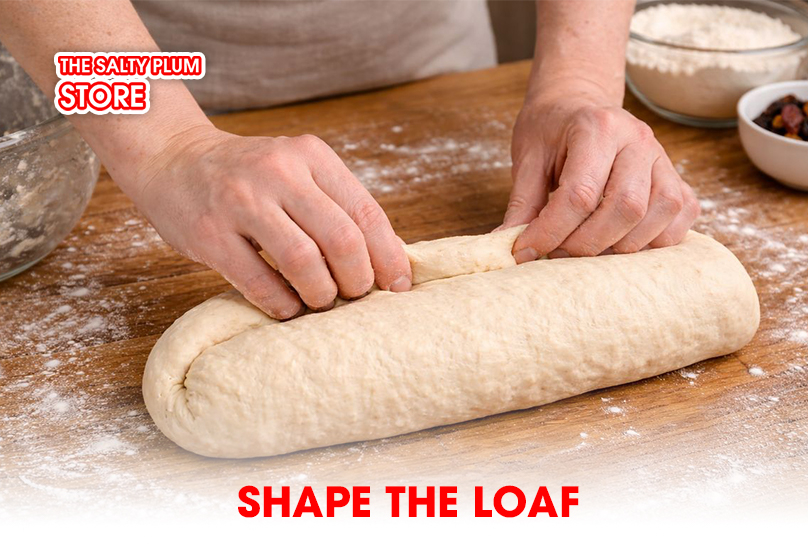
Deflate the risen dough by pressing down to release trapped air. Move it back onto your work surface. Pat into a rectangle roughly 20x30cm.
Starting from the short end, roll the dough tightly into a log. Pinch the seam closed. Tuck the ends under and pinch to seal. This creates tension on the surface for a better rise in your dried fruit bread.
Step 7: Second Rise in the Pan
Grease a 9x5-inch loaf pan thoroughly. Put the shaped dough in the pan with the seam facing down. Cover loosely with the damp towel again.
Let rise for 45-60 minutes until the dough crowns about 2cm above the pan rim. It should look puffy and jiggly when you gently shake the pan.
Step 8: Prepare for Baking

While the dough does its second rise, position your oven rack in the center. Preheat to 180°C (350°F). This gives the oven time to reach true temperature.
Step 9: Apply the Finish
Brush the risen loaf top gently with 1 tablespoon milk using a pastry brush or your fingers. Sprinkle coarse sugar over the top if you want extra crunch and shine.
Step 10: Bake Your Dried Fruit Bread
Slide the pan into the oven that has been preheated. Bake for 35-40 minutes. The crust should bake to a rich golden-brown color. The loaf will sound hollow when you tap the top gently.
To be certain, check the center with an instant-read thermometer. It should read 90-95°C (195-205°F). This ensures your dried fruit bread is baked through without being dry.
Step 11: Cool Properly
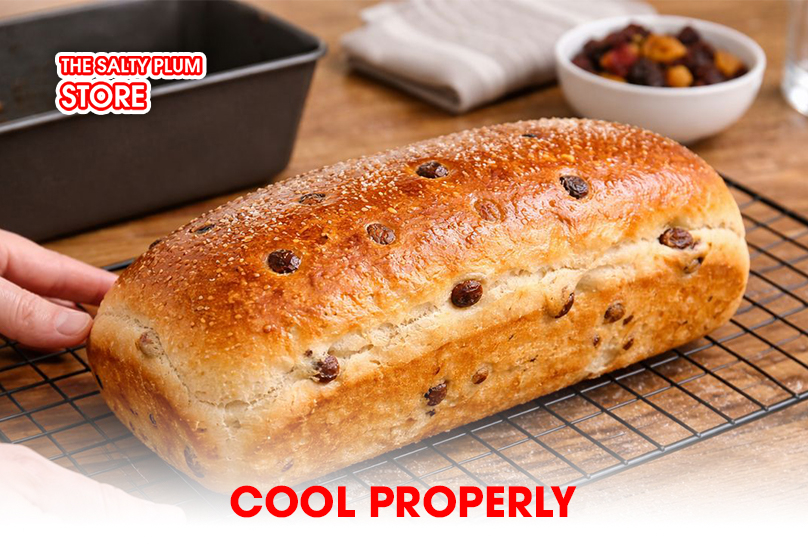
Remove the pan from the oven. Let the bread rest in the pan for 10 minutes. This firms up the structure so it doesn't collapse. Turn the loaf out onto a wire cooling rack. Let it cool fully for at least an hour before slicing. Hot bread tears instead of slicing cleanly.
Troubleshooting Your Dried Fruit Bread
- If the dough isn’t rising well, the room may be too cold. Place the covered bowl in an unheated oven with a pan of boiling water on the bottom rack.
- Top browning too fast? Tent loosely with aluminum foil after 25 minutes of baking.
- Fruit sinking despite flour coating? Your dough might be too wet. Next time, hold back 2 tablespoons of milk and add only if needed.
V. Conclusion
Homemade Dried Fruit Bread is a dependable recipe that combines simple ingredients with clear techniques to produce a moist, flavorful loaf. By preparing the dried fruit properly and following each step in order, you can achieve consistent results even if you are new to baking. This bread works well for breakfast, snacks, or light desserts and stays soft for days when stored correctly.
For the best flavor and texture, ingredient quality matters. If you prefer convenience or want reliable results, you can purchase premium dried fruit from The Salty Plum Store. Using well-selected dried fruit makes the baking process easier and helps your Dried Fruit Bread turn out balanced, aromatic, and satisfying every time.
Related Article: