
I still remember the first time I tasted a raw olive off a tree. I was on a slow trip through a Mediterranean village, and the tree was just there, ancient and inviting. The fruit, however, wasn’t. Bitter, astringent, and almost offensive. That bite made me wonder, how did someone ever figure out how to make olives not just edible but downright delicious?
That question eventually led me here, writing this dried olives recipe. This guide isn’t just about technique; it’s about tradition, patience, and the quiet joy of transforming something wild into something wonderful. Whether you’re a DIY food lover or just curious about old-world flavors, this journey is for you.
What Are Dried Olives?
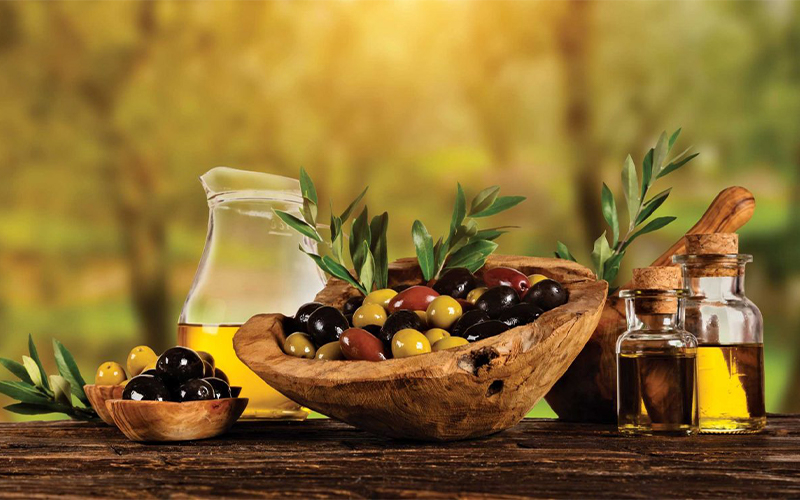
Before diving into the dried olives recipe itself, let’s clarify: we’re talking about naturally cured, salt-dried olives that develop a wrinkled texture and deep, concentrated flavor. These are not oven-dried or oil-soaked versions, but the traditional, air-cured olives you’ll find in southern Europe, usually tucked in a bowl next to a glass of wine or crusty bread. They’re not only delicious but also long-lasting, beautifully preserved through a mix of salt, time, and air.
Choosing the Right Olives
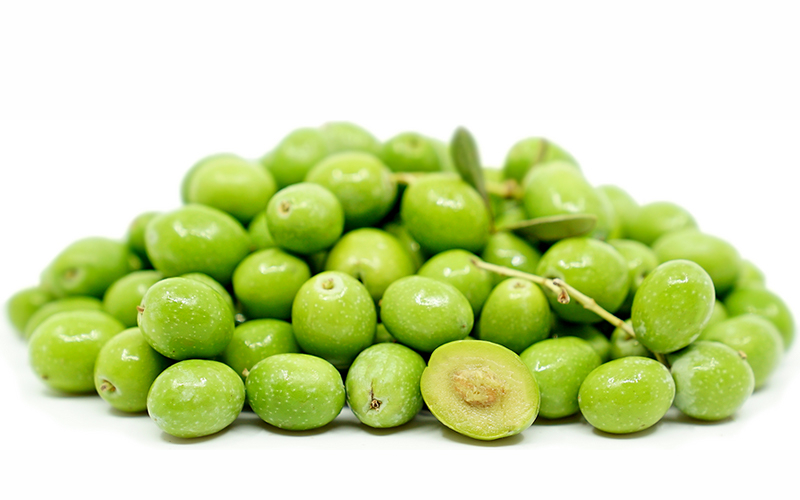
For a successful dried olives recipe, the first step is choosing the right olive variety. Not every olive dries well. Look for:
- Black, ripe olives: These are key. Drying unripe green olives doesn’t give the same results.
- Meaty and firm varieties: Like Kalamata, Gaeta, or Mission olives.
- No blemishes or bruises: Damaged olives will spoil or rot during the curing process.
Once you’ve gathered your batch, around 2 to 3 kg for a good yield, it’s time to get to work.
Ingredients and Tools
Ingredients:
- 2–3 kg of fresh, ripe black olives
- Coarse sea salt (non-iodized)
- Optional: fresh rosemary, garlic cloves, chili flakes, or orange peel for flavoring
Tools:
- A large colander or basket for air circulation
- A wide, shallow tray (if curing flat)
- Clean glass jars or vacuum bags for storage
- Clean hands, patience, and a dry, well-ventilated space
Step-by-Step: Traditional Dried Olives Recipe
Step 1: Cleaning and Sorting
Wash the olives gently in cold water to remove any dirt. Sort out any that are too soft, bruised, or have insect damage. This step is crucial; bad olives can ruin the whole batch.
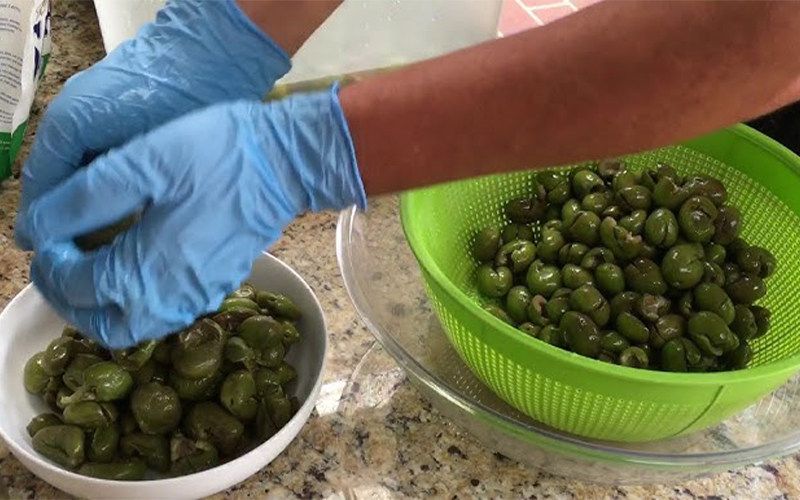
Step 2: Salting and Layering
There are two main ways to follow the dried olives recipe:
A. Basket Method (for airflow):
- Place a layer of olives in a basket.
- Cover with a generous sprinkle of salt.
- Repeat layers until all olives are salted.
- Shake the basket daily to redistribute the salt and juices.
B. Tray Method (for even drying):
- Spread olives in a single layer on a wide tray.
- Cover with coarse salt.
- Stir gently once a day to rotate.
Important Tip: For every 1 kg of olives, use about 100–120 g of salt. Don’t skimp.
Step 3: Curing Time
Let the olives cure for 3–4 weeks. This is the core of any dried olives recipe—the waiting game. Each day, the salt draws out the bitterness and moisture. You’ll notice the olives begin to wrinkle and shrink. Taste one after 2 weeks. If it's still overly bitter, give it more time. You’re aiming for savory, slightly salty, and rich flavors.
Step 4: Optional Flavor Infusion
Once the bitterness is mostly gone and the texture has wrinkled, rinse the olives briefly to remove excess salt. Let them dry for a day.
Now, if you want, toss them with
- A drizzle of extra virgin olive oil
- Crushed garlic
- Rosemary or thyme
- Dried orange peel
- A pinch of chili flakes for heat
Let them sit overnight to absorb the flavor. This is optional, but it adds a final note of complexity to your dried olives recipe.
Step 5: Storage
Proper storage is the secret to long-lasting dried olives.
Option A:
Pack in sterilized glass jars with a little olive oil to coat. Keep in the fridge for up to 3 months.
Option B:
Vacuum seal in small bags and store in a cool, dark place. Lasts up to 6 months.
Note: Always use a clean spoon when serving to prevent mold or contamination.
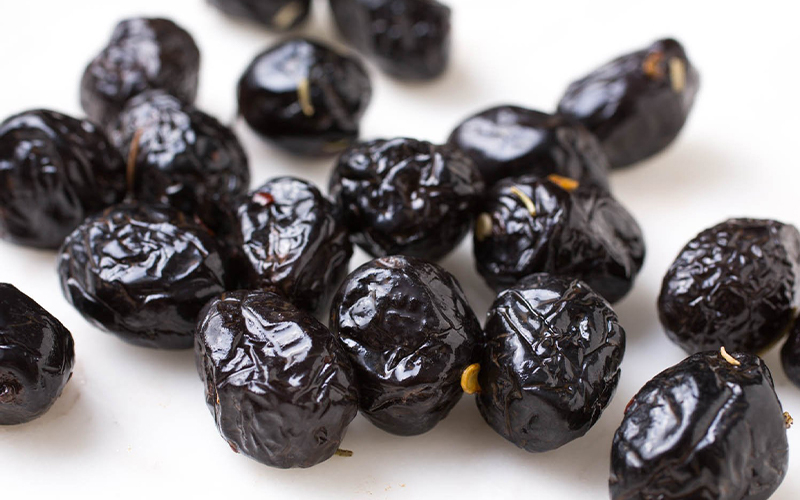
Flavor Profile: What to Expect
The first time I tasted my own cured olives from this dried olives recipe, I had one of those small victories only home foodies understand. The taste was intense, slightly salty but not sharp. The bitterness was gone, replaced by an earthy, deep flavor almost like a dried fig meets aged cheese. With a splash of olive oil and lemon zest, they were divine. These olives are not like the glossy supermarket kind. They’re rustic. Chewy. Moody. Real.
Serving Suggestions
Once your dried olives recipe is complete, try them in these ways:
- As a table snack with cheese and wine
- Tossed into pasta or grain salads
- Mixed into tapenade or spreads
- Chopped and added to the sourdough dough
- With grilled meats or roasted vegetables
You’ll find that they bring a hint of umami and a sense of hand-crafted depth to any dish.

Troubleshooting Tips for First-Timers
Let’s be honest. Not every batch turns out perfect the first time. But every step of this dried olives recipe teaches you something. Here are a few common issues and how to fix them:
- Olives are still bitter after 3 weeks
→ Let them cure longer. Some olive varieties take up to 5 weeks, depending on their size and natural bitterness.
- Mold appears on the olives
→ This often happens when there is too much moisture or poor airflow. Make sure your curing container is dry, and stir the olives daily. If a few moldy olives appear, remove them immediately.
- Over-salted taste
→ After curing, rinse thoroughly and soak the olives in water for 12 hours before the flavoring step. Then dry them and continue with the recipe.
- Olives are too dry and hard
→ This means they over-cured. In the future, test a few olives every 2 days after the second week to find your preferred texture. You can also soften dried olives by soaking them in warm water for 10 minutes before serving.
A great dried olives recipe is as much about attention as it is about steps. Check in on your olives daily, and they will reward you.
Final Thoughts
Crafting dried olives from scratch is slow food in its truest sense. It’s not just about following a dried olives recipe; it’s about preserving time, honoring flavor, and connecting with a tradition that spans centuries.
Whether you’re preparing a small batch for the first time or diving into full Mediterranean pantry mode, this process teaches patience and rewards your senses. Every wrinkle on those olives is a story of salt, sun, and time well spent. If you’ve ever wanted to feel like a culinary artisan in your own kitchen, this is it.
TSG Tip for Beginners:
Always start small for your first dried olives recipe. Try 1 kg of olives, monitor the process closely, and keep tasting along the way. The more you make, the better you’ll understand your own flavor preferences